


Introduction
CodeSandbox is an awesome web-based editor and playground for developers. However, there is not currently a template for TailwindCSS, and no clear way to run Tailwind outside of using a link to the CDN. The CDN approach works, but robs you of a lot of customization, which Tailwind details here. This guide will show you how to get up and running with TailwindCSS in CodeSandbox with a build process included, similar to my previous blog.
Step 1 - CodeSandbox Node Template Setup
To start on this journey, head on over to CodeSandbox, and click "Create Sandbox" in the top right. Then, in the popup, search for or select Node HTTP Server:

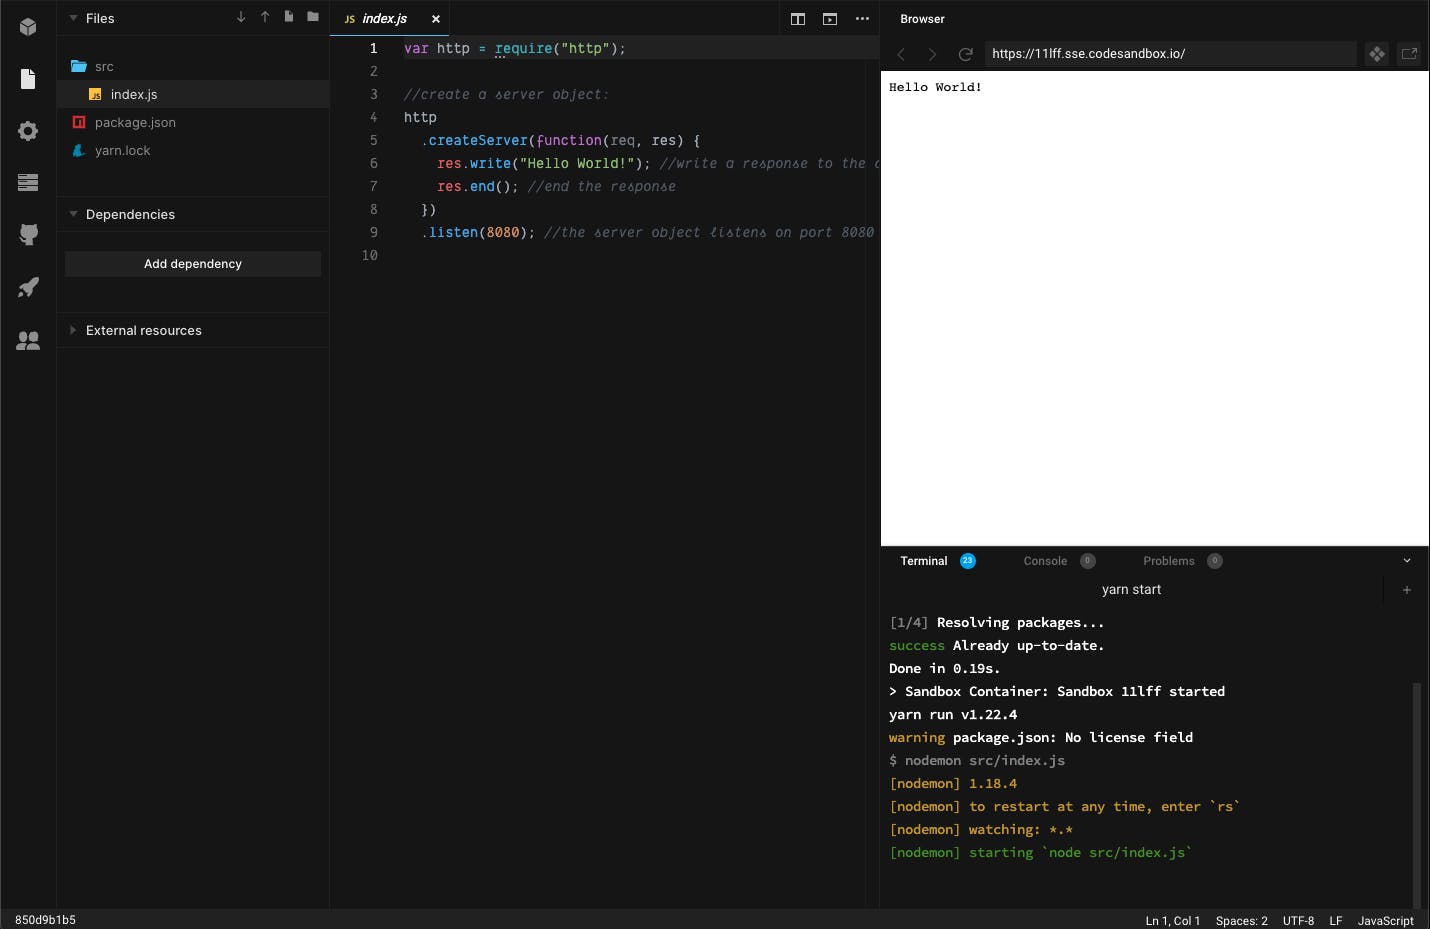
Creating a sandbox based off the Node HTTP Server template is necessary for having access to the Terminal, which is present in CodeSandbox's Container Environments. This will spawn a Node project with a default package.json script that will watch index.js and refresh when it sees changes. Having access to the Terminal is necessary for building and processing our CSS through PostCSS, using Tailwind's Purge capabilities, and for doing any extension or customization of Tailwind (as this requires a Tailwind config file). At this point, you should an environment similar (or hopefully identical) to this:
Note: You will have to sign in with your GitHub account in order to fork/make changes to the Node HTTP Server template! If you have not signed in at this point, please do so before proceeding with this guide.
Good job! You've now got your own Node instance running in CodeSandbox, and you're well on your way to getting to experiment with Tailwind.
Step 2 - Serving the App via Express
Using the built-in http library is great, but we want to quickly and easily serve a static HTML file so that we can focus on creating pages using Tailwind. For this purpose, we'll be using Express to serve an index.html file. This section of the guide is based on scotch.io's article "Use Express to Deliver HTML Files".
To get started, create an index.html file in the src folder of your Node project. Then, insert this HTML into that file:
<!DOCTYPE html>
<html lang="en">
  <head>
    <meta charset="UTF-8" />
    <meta name="viewport" content="width=device-width, initial-scale=1.0" />
    <meta http-equiv="X-UA-Compatible" content="ie=edge" />
    <title>Document</title>
  </head>
  <body>
    <div>Hello from the HTML!</div>
  </body>
</html>
Note: You can also use the Emmet Abbreviation
!orhtml:5to create this snippet, and then add the<div>section!
Now, we need to install a few dependencies. CodeSandbox makes this easy, and you can add new dependencies by clicking the Add dependency button in the primary project sidebar. You'll be greeted with this popup:
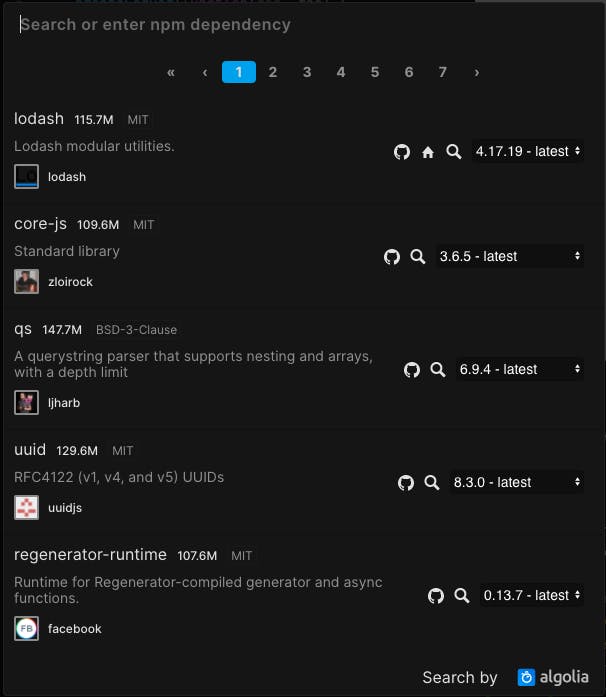
In the search box, type express and click the top result for it (the one with 54.2M+ downloads). After that, bring up the dependency popup again, type path, and add the top result for it (3M+ downloads). In the Dependencies section in the sidebar, you should now see both express and path. They will also be present in your package.json file, since CodeSandbox automatically goes through the full install process for new dependencies.
We're now ready to actually serve the app via express. Head on over to your index.js file and replace the contents of the file with the following JS:
const express = require("express");
const path = require("path");
const app = express();

app.get("/", (req, res) => {
  res.sendFile(path.join(__dirname + "/index.html"));
});

app.listen(8080);
For anyone not familiar with what's going on in the above code, I'll do a quick rundown. First, we're importing the dependencies that we just installed and creating a new instance of express that we can access through app. Then, we're telling app to listen for GET requests on the / path of our HTTP server (which, in this case, is our only path). When a request is made on this path, we're using sendFile to transfer the file at the given path, which we create using the path dependency and by joining __dirname with the location of our index.html that we created in the previous step.
Note:
__dirnameis a core feature of Node.js and returns the absolute path of the file that is currently executing!
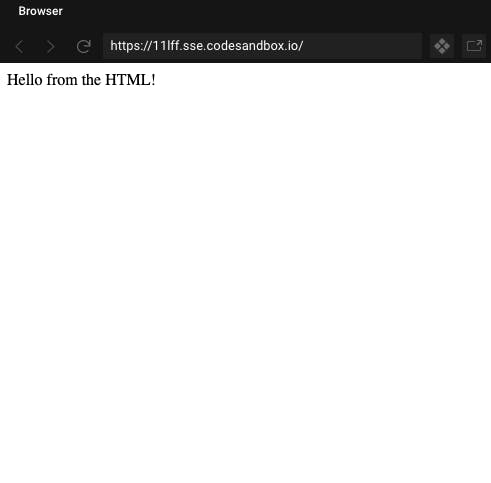
You may notice that the output in the Browser on the right doesn't change when you save index.js. To see the proper output of our modified JS file, just refresh the built-in Browser! You should then see a (mostly) blank page with Hello from the HTML! proudly indicating that you have properly directed Node to serve your HTML file.
We're getting there. The next few steps are pretty easy, so sit back, relax, and read on...
Step 3 - Using live-server to Automatically Reload Our HTML
For this step, open up the trusty Add dependency popup again, type in live-server, and select the top result (383K+ downloads). As before, your new dependency will be visible under Dependencies and in package.json. Now, open up your package.json if you haven't already, and find the scripts block. Under the current start script, add a new line and insert our new watch script, so that your scripts block now looks like so:
"scripts": {
    "start": "nodemon src/index.js",
    "watch": "live-server src/ --no-css-inject"
 }
What we're doing here is telling live-server to serve the files in our src folder, as well as watch for changes in those files. --no-css-inject tells it to reload the page when CSS changes, instead of trying to dynamically inject the CSS (this is important later).
To run this script, we'll need to open up a new Terminal instance. Do so by clicking the + in the sandbox's Terminal section:

Note: We have to open a new
Terminalinstance because CodeSandbox keeps the primary instance (the one that is running when you load the sandbox) in a read-only state, so we can't run commands in there.
Once you've done that, simply type yarn watch and the script we just added will run. You should get output similar to the following:
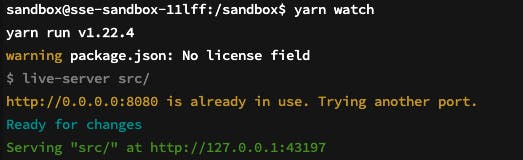
As well as a toast that indicates a new server port has opened, with the option to open it in a new Browser pane. Click that, and you'll once again see your HTML! To verify that our hot-reloading functionality is working, make some changes to the text of your HTML and save. You should see live-server catch the changes and reload your HTML. If not, take a step back and make sure that you have the dependency installed and the script set up properly.
Pretty simple, right? As promised, we have another easy step next...
Note: Whenever this guide says to make a new
Terminalinstance, cancel (withcmd/ctrl+c) or close your old one before running the new commands!
Step 4 - Installing TailwindCSS and Co. (PostCSS and autoprefixer)
If you've read my blog on installing Tailwind, this step will be very familiar to you. I'll hustle through this process in this guide with some light explanation, so head on over to that guide if you want more in-depth explanation!
From the Add dependency popup, add tailwindcss, postcss-cli, and autoprefixer, and create the following configuration file named postcss.config.js in the root directory of your project:
//postcss.config.js
module.exports = {
  plugins: [require("tailwindcss"), require("autoprefixer")]
};
Then, in a new Terminal instance (make sure you've stopped or exited your other one!), run npx tailwindcss init. If this works, you'll see a new file called tailwind.config.js in your root directory. However, if this command didn't work for you, simply create the file manually and paste the following code:
module.exports = {
  purge: [],
  theme: {
    extend: {},
  },
  variants: {},
  plugins: [],
}
You're now set up with some default configurations for postcss and tailwindcss. To finish up with the basic Tailwind installation, we need to create a CSS file. In your src directory, create a new file named index.css and place the default Tailwind directives in there:
@tailwind base;

@tailwind components;

@tailwind utilities;
With this, you've fully installed Tailwind! You can't quite write any TailwindCSS yet though, so let's get to the next step...
Step 5 - Tailwind Purge Configuration
To properly understand this step, we first need to understand the problem (and one of the biggest challenges revolving around running TailwindCSS in CodeSandbox). Come along with me on an adventure of epic (file size) proportions!
In your package.json scripts block, insert the following script:
"build:css": "postcss src/index.css -o src/build/index.css"
Open up another Terminal instance (again, being sure your other instance is not running), and run yarn build:css. Assuming you have your config files from the previous step set up properly, you'll be greeted with this shocking message:
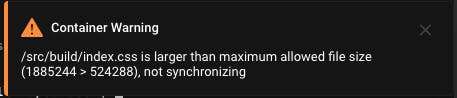
Essentially, we have attempted to create a file so big that it exceeds CodeSandbox's file limits, and we have therefore been blocked from creating it. Unfortunately for us, this build step is absolutely necessary for getting Tailwind running properly, and we're now dead in the water. While this may seem strange, Tailwind's development build is large by design. If you scroll down that page, however, you'll notice that there is is a purge option mentioned that should be run when deploying to production. This option employs tree shaking to prune unused code in Tailwind's output CSS. While normally only used in production, we're going to take advantage of purge in order to optimize the output of our build:css script and get past CodeSandbox's file size limit.
Open your tailwind.config.js file that we created earlier. You'll notice that there is already a purge option present. Replace this line so that the contents of tailwind.config.js now looks like so:
module.exports = {
  purge: {
    enabled: true,
    content: ["./src/**/*.html"]
  },
  theme: {
    extend: {},
  },
  variants: {},
  plugins: [],
}
See the difference in purge? What we're doing here is explicitly enabling purge, regardless of the environment. Then, we're directing it to the files that it needs to purge, which is any HTML file under our src folder.
Now, for the moment of truth. Go back to your Terminal, and run yarn build:css. This time, there should be no toast notifying you of file size issues. To verify that our script worked, look for a new build folder under src. Inside this folder should be a file named index.css.
Congrats! You've successfully worked around CodeSandbox's file size limit, and have processed TailwindCSS using PostCSS. We have just one more (!) step before we can fully incorporate Tailwind into our app!
Step 6 - watch Script Modification and Final Additions to index.html
This is really two steps in one, but I hope you'll cut me some slack on that.
For the final time in this guide, head back over to your package.json file and modify your watch script to be the following:
"watch": "live-server src/ --no-css-inject & nodemon --watch 'src/**/*.html' -e html --exec 'yarn build:css'",
Whoa! We added a lot here. Let's break this down a little.
First, the & symbol (since we already know what live-server does. We have two separate commands in this line (before and after this symbol) that we want to run in parallel. This is exactly what & does: it tells yarn to run both the live-server and nodemon commands at the same time.
Second, the nodemon command. nodemon is a utility that watches files and will automatically restart a Node server when those files change. However, in our implementation, we're changing that quite a bit. By default, nodemon only watches for a few file types. So, we're first telling nodemon to watch all HTML files under our src directory. Then, we're modifying the file extensions it looks for with the -e command, where we tell it to watch for files with the html file extension. Finally, we're telling it to execute our yarn build:css with the --exec flag. In plain English, here's the entire command:
nodemon, please watch for all changes to HTML files in my src directory with a .html file extension and rebuild my CSS when those files change
Simpler than it seems at first, right?
I know you're as anxious as I am to get this done and see the fruits of our labor, so head over to your index.html file. Add the following <link> element in between the <head> tags:
<link rel="stylesheet" href="/build/index.css" />
Then, in the <div> we created a long time ago, add a new class attribute:
class="bg-teal-400"
Your HTML should now look like this:
<!DOCTYPE html>
<html lang="en">
  <head>
    <meta charset="UTF-8" />
    <meta name="viewport" content="width=device-width, initial-scale=1.0" />
    <meta http-equiv="X-UA-Compatible" content="ie=edge" />
    <link rel="stylesheet" href="/build/index.css" />
    <title>Document</title>
  </head>
  <body>
    <div class="bg-teal-400">Hello from the HTML!</div>
  </body>
</html>
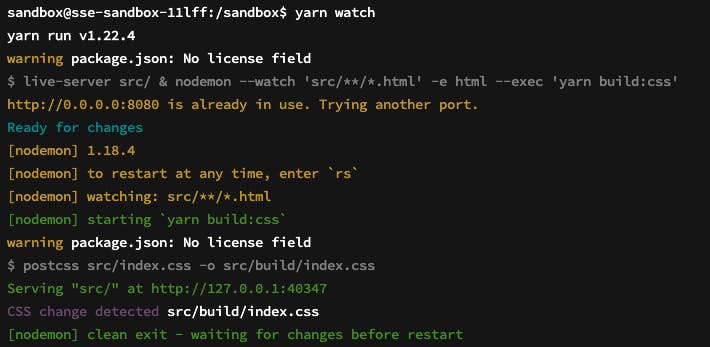
We're now at the finish line, so let's cross it together. Open your Terminal, and type yarn watch. You'll see output similar to the following, and be prompted to open a new Browser pane (just like before):
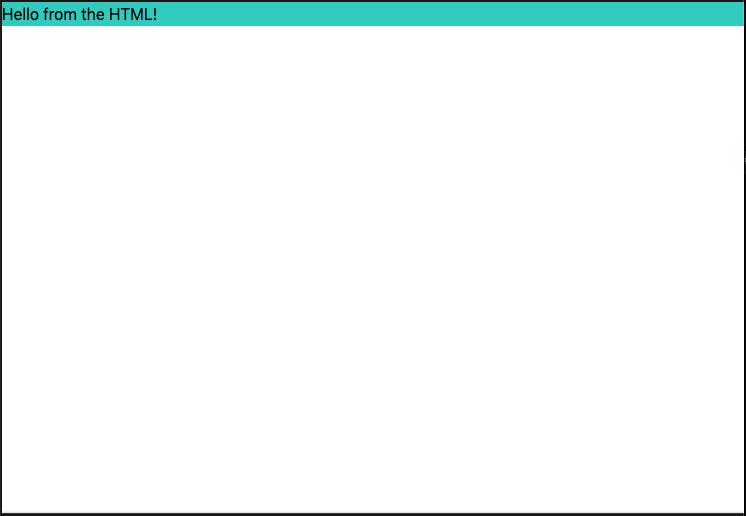
If everything we've gone through worked properly, you should now see a beautiful teal background on our div!
Note: You will, typically, see the Browser reload a couple times when you change your TailwindCSS. This is because live-server sees a change in the HTML when we change the CSS and reloads, then reloads again when our
index.cssfile is re-generated. Fear not! This is normal and expected with this configuration.
We have now successfully implemented TailwindCSS in our CodeSandbox project! Though this process may seem a little daunting, it's actually pretty quick and simple when you get the hang of it and understand what's going on. If you want to see the completed template and fork it for yourself, take a look at the completed guide project here:
As always, to continue your adventure with Tailwind, check out their offical documentation!